I had posted a while back about the dreaded Checkbox of Doom which is a real pain in the Migration Scenarios where few AD Users might be marked as protected (Admincount = 1) but we don't really know which Group membership (marked as protected) might be causing this.
Shout out to MVP Ace Fekay for providing his insights on the topic :)
It becomes a pain when the Groups are nested multiple levels and to determine which Portected Groups membership the User have which might be causing the Inheritance disabled (checkbox of doom).
[Update] Fellow friend andMVP Guido Oliveira highlighted that he had come across an issue where the AdminCount was once set to 1 when the User was part of a Protected Group. Once he was removed from the Group as per the Wiki Link shared at the end the AdminCount and the Inheritance will still be disabled so this Function can hunt those accounts too.
Function is up for download @Technet : Click Here
![]()
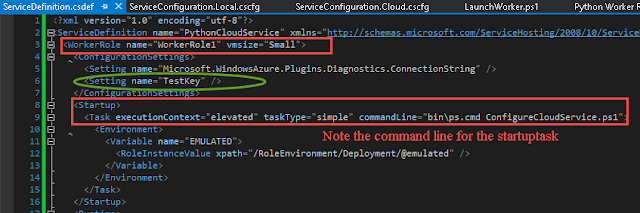
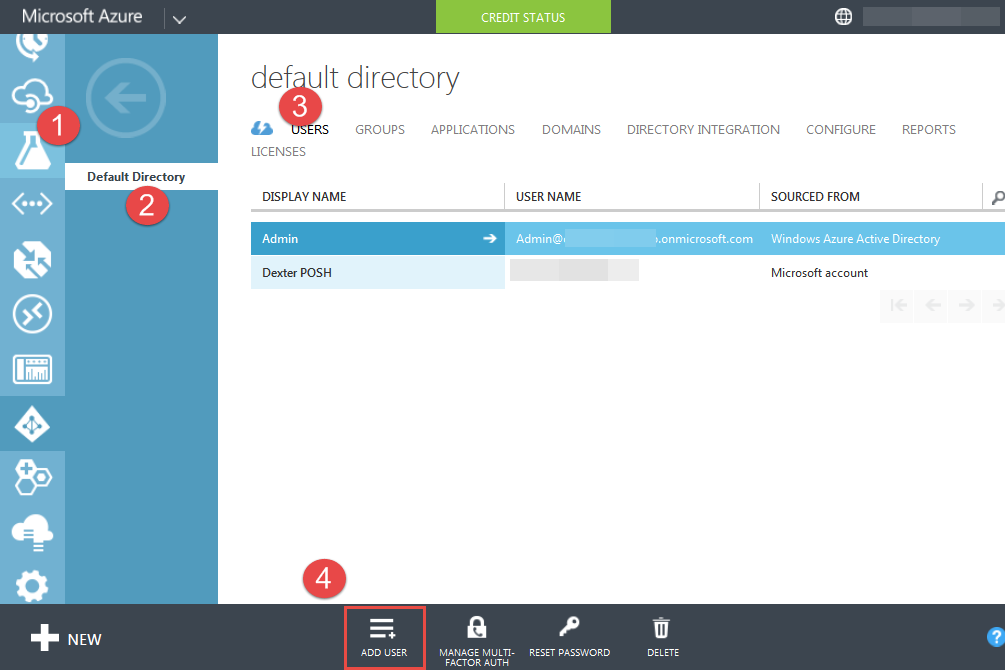
Now after explaining the Nested Scenario, I am going to explicitly remove the Inheritance from one of the User named Abdul.Yanwube, see below :
![]()
Now I did this to actually show the 2 types of accounts which can have Inheritance disabled :
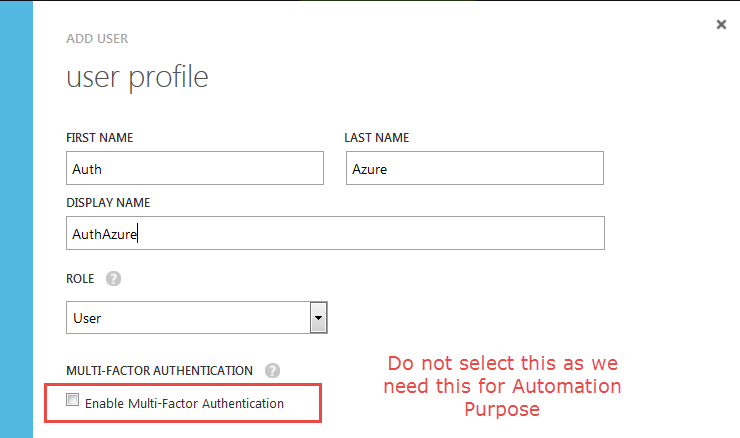
If you have a list of SamAccountNames dumped in a CSV/ text file or any data source and you know how to fetch it using PowerShell, then you can pipe the string array of SamAccountName to the Function and it will process them.
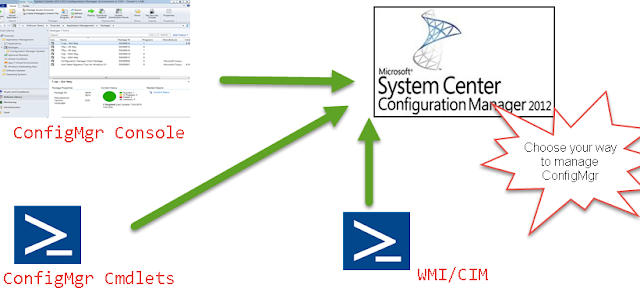
For Example: a test.txt file has the samaccountnames - dexterposh,test123,xyz1abc & abdul.yanwube in it. We use Get-Content to get the content and pipe it to the Function like below :
Below is a gist showing this in action:
![]()
If you have any suggestions on how to improve the Script then please leave a comment or contact me :)
Shout out to MVP Ace Fekay for providing his insights on the topic :)
It becomes a pain when the Groups are nested multiple levels and to determine which Portected Groups membership the User have which might be causing the Inheritance disabled (checkbox of doom).
[Update] Fellow friend andMVP Guido Oliveira highlighted that he had come across an issue where the AdminCount was once set to 1 when the User was part of a Protected Group. Once he was removed from the Group as per the Wiki Link shared at the end the AdminCount and the Inheritance will still be disabled so this Function can hunt those accounts too.
Function is up for download @Technet : Click Here
Read below on how to use the Script and the Scenario it tackles.
Scenario
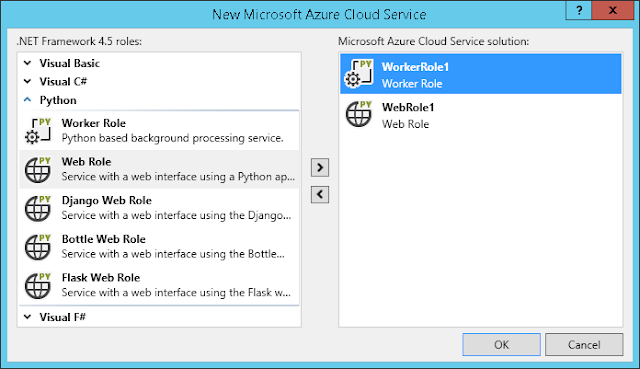
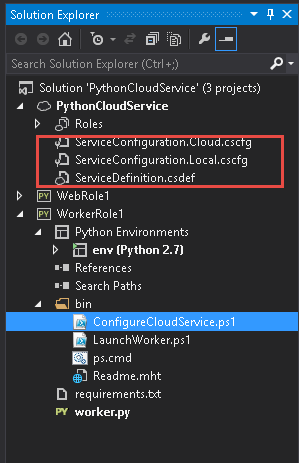
I have 2 groups named NestedGroup1 & NestedGroup2 which are nested like below in the Server Operators (Protected Group) , also they have a User xyzabc& test123 added respectively to each as shown below :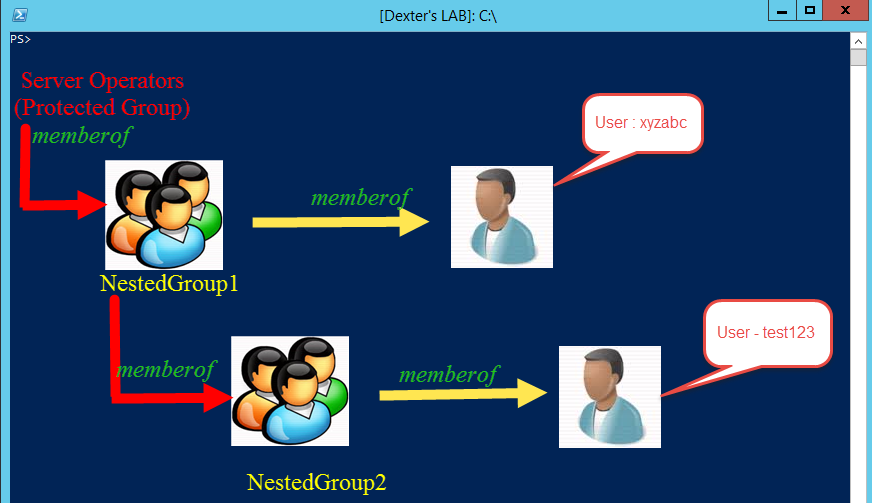
Now after explaining the Nested Scenario, I am going to explicitly remove the Inheritance from one of the User named Abdul.Yanwube, see below :
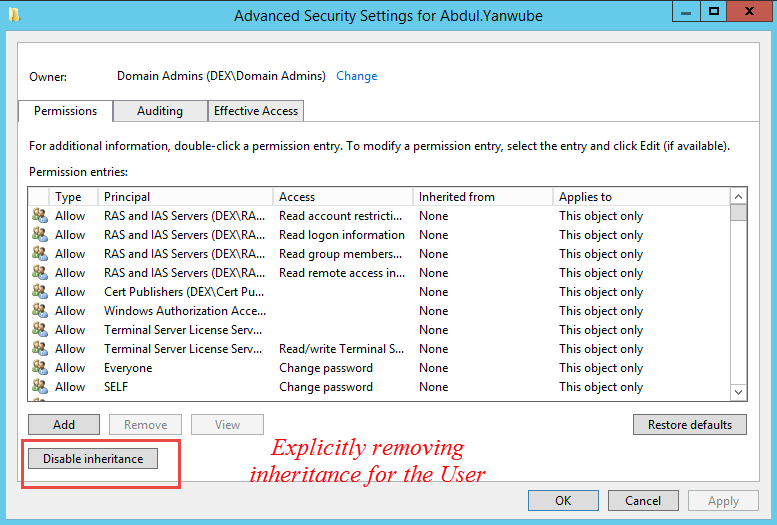
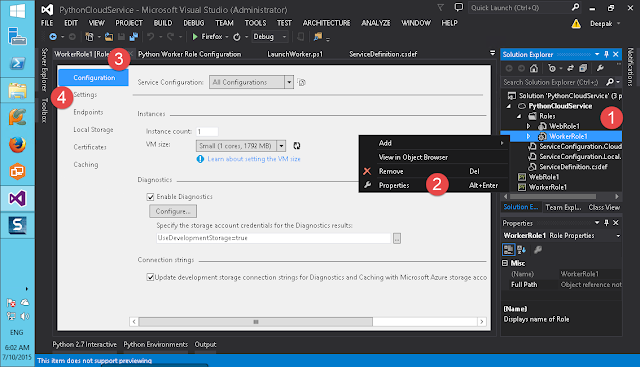
Now I did this to actually show the 2 types of accounts which can have Inheritance disabled :
- Protected Accounts : AD Users which are part of a Protected Group (can be nested)
- Non Admin Users : AD Users which might have Inheritance disabled because of Manual Error or during Migration if something broke and disabled inheritance.
Running the Function :
Note - The Function leverages the ActiveDirectory PowerShell Module (prerequisite).
Dot Source the PS1 file (got from Technet).
Once done read the help for the function by issuing below :
. C:\Users\Dexter\Downloads\Get-ADUserWithInheritanceDisabled.ps1 #Mark the first dot at beginning
Once done read the help for the function by issuing below :
help Get-ADUserWithInheritanceDisabled -Full
The Function uses the AD PowerShell Module to fetch the ADUsers with needed attributes and then process them. The Function has 3 parameter sets based on how the Get-ADUser cmdlet from the AD PS Module is invoked to fetch the Users.
- Specifying SamAccountName(s)
- Using -Filter with SearchBase and SearchScope
- Using -LDAPFilter with SearchBase and SearchScope
Specifying SamAccountName(s)
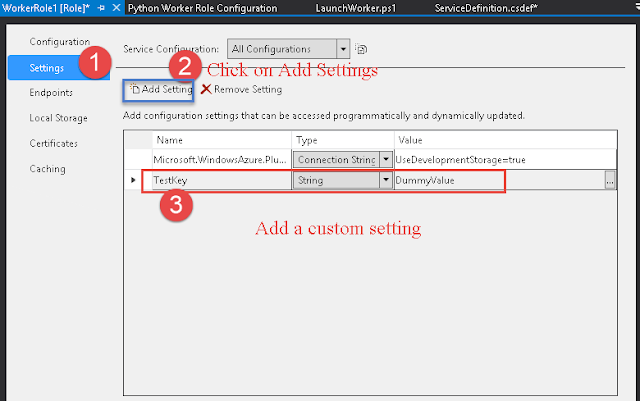
If you have a list of SamAccountNames dumped in a CSV/ text file or any data source and you know how to fetch it using PowerShell, then you can pipe the string array of SamAccountName to the Function and it will process them.
For Example: a test.txt file has the samaccountnames - dexterposh,test123,xyz1abc & abdul.yanwube in it. We use Get-Content to get the content and pipe it to the Function like below :
PS>Get-Content C:\temp\test.txt | Get-ADUserWithInheritanceDisabled


SamAccountname      : DexterPOSH
UserPrincipalname   : DexterPOSH@dex.com
IsAdmin             : True
InheritanceDisabled : True
ProtectedGroup1     : CN=Schema Admins,CN=Users,DC=dex,DC=com
ProtectedGroup2     : CN=Administrators,CN=Builtin,DC=dex,DC=com
ProtectedGroup3     : CN=Enterprise Admins,CN=Users,DC=dex,DC=com
ProtectedGroup4     : CN=Domain Admins,CN=Users,DC=dex,DC=com

SamAccountname      : test123
UserPrincipalname   : test123@dex.com
IsAdmin             : True
InheritanceDisabled : True
ProtectedGroup1     : CN=NestedGroup2,CN=Users,DC=dex,DC=com

WARNING:  [PROCESS] : SamAccountName : Cannot find an object with identity: 'xyz1abc' under: 'DC=dex,DC=com'..exception
SamAccountname      : Abdul.Yanwube
UserPrincipalname   : Abdul.Yanwube@dex.com
IsAdmin             : False
InheritanceDisabled : True
Note - The Function throws a warning if it is not able to locate a User with the account name.
Also see the output for a while and see that it reports the Scenario we had discussed earlier.
Also see the output for a while and see that it reports the Scenario we had discussed earlier.
Using -Filter with SearchBase and SearchScope
Now there might be times when you want to search a particular OU in AD recursively for Users with Inheritance disabled.As the function uses Get-ADUser to retrieve the User details the -Filter (Mandatory), -SearchBase, - SearchScope parameters are the same you would use with the Get-ADUser cmdlet.
Note - Below how the use of Base & OneLevel argument to -SearchScope parameter changes the result.
PS>Get-ADUserWithInheritanceDisabled -Filter * -SearchBase 'OU=ExchangeUsers,DC=Dex,DC=Com' -SearchScope Base

PS>Get-ADUserWithInheritanceDisabled -Filter * -SearchBase 'OU=ExchangeUsers,DC=Dex,DC=Com' -SearchScope OneLevel


SamAccountname      : DexterPOSH
UserPrincipalname   : DexterPOSH@dex.com
IsAdmin             : True
InheritanceDisabled : True
ProtectedGroup1     : CN=Schema Admins,CN=Users,DC=dex,DC=com
ProtectedGroup2     : CN=Administrators,CN=Builtin,DC=dex,DC=com
ProtectedGroup3     : CN=Enterprise Admins,CN=Users,DC=dex,DC=com
ProtectedGroup4     : CN=Domain Admins,CN=Users,DC=dex,DC=com
Using -LDAPFilter with SearchBase and SearchScope
If you are more comfortable to using LDAPFilter then the Function let's you use them in order to search for Users matching the criteria and processes them.
PS>Get-ADUserWithInheritanceDisabled -LDAPFilter '(&(objectCategory=person)(objectClass=user)(name=test*))' -SearchBase 'OU=ExchangeUsers,Dc=Dex,Dc=Com'


SamAccountname      : test123
UserPrincipalname   : test123@dex.com
IsAdmin             : True
InheritanceDisabled : True
ProtectedGroup1     : CN=NestedGroup2,CN=Users,DC=dex,DC
The Function spits out CustomObjects which have the relevant information for the Users and as discussed in the Scenario it is able to detect the corresponding protected Groups for a User with Inheritance disabled (if any) and report them.
Below is a gist showing this in action:

If you have any suggestions on how to improve the Script then please leave a comment or contact me :)